The installation position of the plunger pump should be lower than the lowest position of the liquid level in the oil tank
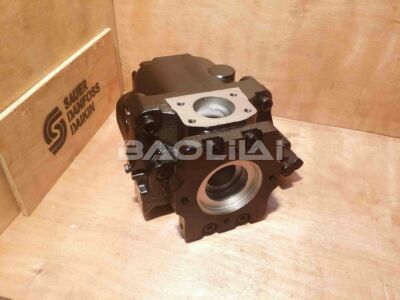
When installing plunger pumps, including Danfoss Series 45 E-type plunger pumps, it is generally recommended to locate the pump below the minimum level of liquid in the tank. This arrangement helps ensure that the pump remains primed and properly lubricated. By placing the pump below the oil level, gravity can help draw liquid into the pump inlet, promoting efficient priming and preventing cavitation. Also, keeping the pump below liquid level helps maintain a positive head at the pump inlet, which helps the pump operate efficiently. It is worth noting that exact installation requirements may vary depending on the specific pump model and manufacturer's guidelines. It is therefore essential to consult the pump's documentation or contact Danfoss or its authorized representative for exact installation instructions tailored to your specific pump model. Following recommended installation practices will help ensure optimum performance and life of your displacement pump. In addition to locating the plunger pump below the minimum level of liquid in the tank, there are a few other considerations to keep in mind during installation: 1. Mounting: Make sure the pump is securely mounted on a stable surface or stand. This helps minimize vibration and ensures proper alignment with the drive system. ER-R-130B-LS-21-20-NN-N-3-S2NP-A1N-NNN-NNN-NNN ERR130BLS2120NNN3S2NPA1NNNNNNNNNNNN ER-R-130B-LS-21-20-NN-N-3-S2CP-A1N-NNN-NNN-NNN ERR130BLS2120NNN3S2CPA1NNNNNNNNNNNN ER-R-130B-LS-21-20-NN-N-3-S2CP-A1N-AAA-NNN-NNN ERR130BLS2120NNN3S2CPA1NAAANNNNNN ER-R-130B-LS-21-20-NN-N-3-S2BP-A1N-NNN-NNN-NNN ERR130BLS2120NNN3S2BPA1NNNNNNNNNNNN ER-R-130B-LS-21-20-NN-N-3-S1VP-A1N-NNN-NNN-NNN ERR130BLS2120NNN3S1VPA1NNNNNNNNNNNN ER-R-130B-LS-21-20-NN-N-3-S1RP-A1N-AAA-NNN-NNN ERR130BLS2120NNN3S1RPA1NAAANNNNNN ER-R-130B-LS-21-20-NN-N-3-S1NP-A1N-NNN-NNN-NNN ERR130BLS2120NNN3S1NPA1NNNNNNNNNNNN ER-R-130B-LS-21-20-NN-N-3-S1NP-A1N-AAA-NNN-NNN ERR130BLS2120NNN3S1NPA1NAAANNNNNN ER-R-130B-LS-21-20-NN-N-3-S1NL-A1N-NNN-NNN-NNN ERR130BLS2120NNN3S1NLA1NNNNNNNNNNNN ER-R-130B-LS-21-20-NN-N-3-S1LP-A1N-AAA-NNN-NNN ERR130BLS2120NNN3S1LPA1NAAANNNNNN ER-R-130B-LS-21-20-NN-N-3-S1CP-A1N-NNN-NNN-NNN ERR130BLS2120NNN3S1CPA1NNNNNNNNNNNN ER-R-130B-LS-21-20-NN-N-3-S1CP-A1N-AAA-NNN-NNN ERR130BLS2120NNN3S1CPA1NAAANNNNNN ER-R-130B-LS-21-20-NN-N-3-S1BP-A1N-AAA-NNN-NNN ERR130BLS2120NNN3S1BPA1NAAANNNNNN ER-R-130B-LS-21-20-NN-N-3-S1AP-A1N-NNN-NNN-NNN ERR130BLS2120NNN3S1APA1NNNNNNNNNNNN ER-R-130B-LS-21-20-NN-N-3-K5CP-A1N-NNN-NNN-NNN ERR130BLS2120NNN3K5CPA1NNNNNNNNNNNN ER-R-130B-LS-21-20-NN-N-3-K5AP-A1N-NNN-NNN-NNN ERR130BLS2120NNN3K5APA1NNNNNNNNNN ER-R-130B-LS-21-15-NN-N-3-S2RP-A1N-AAA-NNN-NNN ERR130BLS2115NNN3S2RPA1NAAANNNNNN ER-R-130B-LS-20-30-NN-N-3-K5AP-A1N-AAA-NNN-NNN ERR130BLS2030NNN3K5APA1NAAANNNNNN ER-R-130B-LS-20-25-NN-N-3-S2AP-A1N-AAA-NNN-NNN ERR130BLS2025NNN3S2APA1NAAANNNNNN ER-R-130B-LS-20-25-NN-N-3-S1NP-A1N-NNN-NNN-NNN ERR130BLS2025NNN3S1NPA1NNNNNNNNNNNN ER-R-130B-LS-20-25-NN-N-3-K5CP-A1N-AAA-NNN-NNN ERR130BLS2025NNN3K5CPA1NAAANNNNNN 2. Inlet piping: Use properly sized inlet piping to minimize pressure drop and maintain effective flow into the pump. Avoid sharp bends or restrictions in piping that could cause turbulence or cavitation. 3. Outlet piping: Again, to achieve a steady flow and minimize pressure loss, use an appropriately sized outlet piping. Make sure that the piping is adequately supported to avoid excessive pressure on the pump and its connections. 4. Priming: Before priming the pump, make sure it is properly primed to remove any air bubbles. This can be done by filling the pump and inlet piping with liquid, making sure there are no air leaks or trapped air. 5. Ventilation: Provide adequate ventilation in the area where the pump is installed to prevent heat buildup. Displacement pumps generate heat during operation, so proper ventilation will help dissipate heat and maintain optimal operating conditions. 6. Alignment: Proper alignment between the pump and drive system is critical for smooth operation and preventing premature wear. Use a suitable alignment tool or technique to ensure that the pump shaft is aligned with the motor or engine shaft. 7. Mounting base: Use a strong and level mounting base to support the weight of the pump and ensure stability during operation. The mount should dampen vibration and minimize any potential movement or shifting. ER-R-130B-LS-20-20-NN-N-3-S4WP-A1N-NNN-NNN-NNN ERR130BLS2020NNN3S4WPA1NNNNNNNNNNNN ER-R-130B-LS-20-20-NN-N-3-S4RP-A1N-AAA-NNN-NNN ERR130BLS2020NNN3S4RPA1NAAANNNNNNN ER-R-130B-LS-20-20-NN-N-3-S4BP-A1N-NNN-NNN-NNN ERR130BLS2020NNN3S4BPA1NNNNNNNNNNNN ER-R-130B-LS-20-20-NN-N-3-S4BP-A1N-AAA-NNN-NNN ERR130BLS2020NNN3S4BPA1NAAANNNNNN ER-R-130B-LS-20-20-NN-N-3-S4AP-A1N-AAA-NNN-NNN ERR130BLS2020NNN3S4APA1NAAANNNNNN ER-R-130B-LS-20-20-NN-N-3-S1VP-A1N-NNN-NNN-NNN ERR130BLS2020NNN3S1VPA1NNNNNNNNNNNN ER-R-130B-LS-20-20-NN-N-3-S1RP-A1N-AAA-NNN-NNN ERR130BLS2020NNN3S1RPA1NAAANNNNNN ER-R-130B-LS-20-20-NN-N-3-S1NP-A1N-NNN-NNN-NNN ERR130BLS2020NNN3S1NPA1NNNNNNNNNNNN ER-R-130B-LS-20-20-NN-N-3-S1NP-A1N-AAA-NNN-NNN ERR130BLS2020NNN3S1NPA1NAAANNNNNN ER-R-130B-LS-20-20-NN-N-3-S1NL-A1N-NNN-NNN-NNN ERR130BLS2020NNN3S1NLA1NNNNNNNNNNNN ER-R-130B-LS-20-20-NN-N-3-S1CP-A1N-NNN-NNN-NNN ERR130BLS2020NNN3S1CPA1NNNNNNNNNNNN ER-R-130B-LS-20-20-NN-N-3-S1BP-A1N-AAA-NNN-NNN ERR130BLS2020NNN3S1BPA1NAAANNNNNN ER-R-130B-LS-20-20-NN-N-3-S1AP-A1N-NNN-NNN-NNN ERR130BLS2020NNN3S1APA1NNNNNNNNNNNN ER-R-130B-LS-20-20-NN-N-3-K5VP-A1N-NNN-NNN-NNN ERR130BLS2020NNN3K5VPA1NNNNNNNNNNNN ER-R-130B-LS-20-20-NN-N-3-K5RP-A1N-AAA-NNN-NNN ERR130BLS2020NNN3K5RPA1NAAANNNNNN ER-R-130B-LS-20-20-NN-N-3-K5AP-A1N-AAA-NNN-NNN ERR130BLS2020NNN3K5APA1NAAANNNNNN ER-R-130B-LS-20-18-NN-N-3-S1NL-A1N-NNN-NNN-NNN ERR130BLS2018NNN3S1NLA1NNNNNNNNNNNN ER-R-130B-LS-20-17-NN-N-3-K5NP-A1N-NNN-NNN-NNN ERR130BLS2017NNN3K5NPA1NNNNNNNNNNNN ER-R-130B-LS-20-15-NN-N-3-K5NP-A1N-NNN-NNN-NNN ERR130BLS2015NNN3K5NPA1NNNNNNNNNNNN ER-R-130B-LS-20-12-NN-E-3-S1BP-A1N-NNN-NNN-NNN ERR130BLS2012NNE3S1BPA1NNNNNNNNNNNN ER-R-130B-LS-19-20-NN-N-3-S4NL-A1N-AAA-NNN-NNN ERR130BLS1920NNN3S4NLA1NAAANNNNNN 8. Sealing: Make sure all connections and fittings are properly sealed to prevent leaks. Follow the manufacturer's guidelines for sealing materials and techniques. This includes using appropriate seals or gaskets at pump connections such as inlet and outlet. 9. Accessibility: Sufficient space is left around the pump for maintenance and maintenance. This includes ensuring easy access to critical components such as inlet filters, valves and any regulating mechanisms. Adequate clearance is also important for removing and installing piston pump components when required. 10. Electrical connection: If the pump is driven by a motor, please follow the electrical safety guidelines for wiring and connection. Make sure the power supply matches the voltage of the pump and that the electrical components are properly grounded. 11. System Protection: Consider additional protection, such as a filter or strainer, to prevent any contaminants from entering the pump and causing damage. These help extend the life of the pump and maintain its performance. 12. System pressure relief: Install a pressure relief valve or a pressure limiting device in the hydraulic system to prevent the pump pressure from being too high. This helps prevent damage to the pump and ensures safe operation. 13. Lubrication: Follow the manufacturer's recommendations for pump lubrication, including the type and amount of lubricant used. Proper lubrication is essential to reduce friction, prevent wear and maintain peak performance. 14. System filtration: add a suitable filtration system to the hydraulic circuit to remove pollutants in the fluid. This helps protect the pump and other components from damage and ensures smooth operation. ER-R-130B-LS-19-20-NN-N-3-S1NL-A1N-NNN-NNN-NNN ERR130BLS1920NNN3S1NLA1NNNNNNNNNNNN ER-R-130B-LS-18-20-NN-N-3-S4CP-A1N-NNN-NNN-NNN ERR130BLS1820NNN3S4CPA1NNNNNNNNNNNN ER-R-130B-LS-18-20-NN-N-3-S2RP-A1N-NNN-NNN-NNN ERR130BLS1820NNN3S2RPA1NNNNNNNNNNNN ER-R-130B-LS-18-20-NN-N-3-S2RP-A1N-AAA-NNN-NNN ERR130BLS1820NNN3S2RPA1NAAANNNNNN ER-R-130B-LS-18-20-NN-N-3-S2CP-A1N-NNN-NNN-NNN ERR130BLS1820NNN3S2CPA1NNNNNNNNNNNN ER-R-130B-LS-18-20-NN-N-3-S1RP-A1N-NNN-NNN-NNN ERR130BLS1820NNN3S1RPA1NNNNNNNNNNNN ER-R-130B-LS-18-20-NN-N-3-S1NP-A1N-NNN-NNN-NNN ERR130BLS1820NNN3S1NPA1NNNNNNNNNNNN ER-R-130B-LS-18-20-NN-N-3-S1NP-A1N-AAA-NNN-NNN ERR130BLS1820NNN3S1NPA1NAAANNNNNN ER-R-130B-LS-18-20-NN-N-3-S1CP-A1N-NNN-NNN-NNN ERR130BLS1820NNN3S1CPA1NNNNNNNNNNNN ER-R-130B-LS-18-20-NN-N-3-K5NP-A1N-NNN-NNN-NNN ERR130BLS1820NNN3K5NPA1NNNNNNNNNNNN ER-R-130B-LS-18-20-NN-N-3-K5NL-A1N-NNN-NNN-NNN ERR130BLS1820NNN3K5NLA1NNNNNNNNNN ER-R-130B-LS-18-20-NN-E-3-S1NL-A1N-NNN-NNN-NNN ERR130BLS1820NNE3S1NLA1NNNNNNNNNNNN ER-R-130B-LS-17-30-NN-N-3-K5NL-A1N-NNN-NNN-NNN ERR130BLS1730NNN3K5NLA1NNNNNNNNNN ER-R-130B-LS-17-30-NN-N-3-K5NL-A1N-AAA-NNN-NNN ERR130BLS1730NNN3K5NLA1NAAANNNNNN ER-R-130B-LS-17-25-NN-N-3-S1AP-A1N-NNN-NNN-NNN ERR130BLS1725NNN3S1APA1NNNNNNNNNNNN ER-R-130B-LS-17-25-NN-E-3-S1AP-A1N-NNN-NNN-NNN ERR130BLS1725NNE3S1APA1NNNNNNNNNN ER-R-130B-LS-17-20-NN-N-3-S4BP-A1N-NNN-NNN-NNN ERR130BLS1720NNN3S4BPA1NNNNNNNNNNNN ER-R-130B-LS-17-20-NN-N-3-S2AP-A1N-NNN-NNN-NNN ERR130BLS1720NNN3S2APA1NNNNNNNNNNNN ER-R-130B-LS-17-20-NN-N-3-S1NP-A1N-NNN-NNN-NNN ERR130BLS1720NNN3S1NPA1NNNNNNNNNNNN ER-R-130B-LS-17-20-NN-N-3-S1CP-A1N-AAA-NNN-NNN ERR130BLS1720NNN3S1CPA1NAAANNNNNN ER-R-130B-LS-17-20-NN-N-3-S1BP-A1N-NNN-NNN-NNN ERR130BLS1720NNN3S1BPA1NNNNNNNNNNNN 15. System flushing: Before installing the displacement pump, consider flushing the hydraulic system to remove any debris or contamination that may affect pump performance. Flushing helps keep it clean and prolongs pump life. 16. Testing and debugging: After the pump is installed, conduct a thorough test and debugging to ensure its normal operation. This may involve checking for leaks, verifying proper flow and pressure, and confirming that all controls and safety functions are functioning properly. 17. Maintenance plan: Make a regular maintenance plan for the plunger pump and follow it. Follow the manufacturer's recommendations for routine inspection, cleaning, lubrication, and component replacement to help maximize pump life and reliability. 18. Safety precautions: safety first when installing and operating. Follow all applicable safety guidelines, including proper use of personal protective equipment, electrical safety protocols, and isolating the system during maintenance or repair. Always refer to the manufacturer for specific installation instructions and recommendations, as well as any relevant industry standards or regulations. If you have any doubts or doubts during the installation process, it is recommended to consult Danfoss or its authorized representatives for expert guidance and support.
This article is published by the official website of Baolilai Hydraulics, please contact the author and indicate the source for reprinting:https://www.baolilai-pump.cn/news/911.html