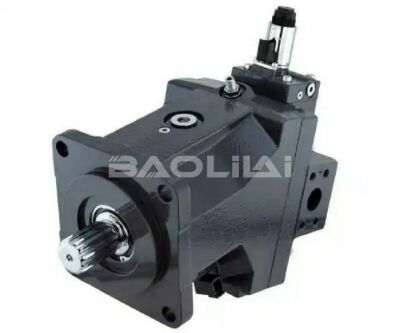
How to correctly adjust the axial clearance of the plunger motor
Adjusting axial clearance in a piston motor often involves making precise changes in the positioning of components within the motor assembly. The specific steps may vary depending on the type and design of the motor, so it is necessary to consult the manufacturer's documentation or guidance for your specific motor. However, I can give you a general overview of the process, which can be applied to various types of plunger motors. Tools and equipment required: 1. Proper safety equipment (gloves, safety glasses, etc.) 2. Motor manufacturer’s documentation and specifications. 3. Precision measuring tools (calipers, micrometers, etc.). 4. Appropriate tools required to disassemble the motor (screwdriver, wrench, etc.). 5. Spacers or shims (if required). program: 1.Safety Precautions: Before operating on the plunger motor, make sure it is turned off and disconnected from any power source to prevent accidental starting. 2. Consult the documentation: Consult the manufacturer's documentation for your specific piston motor to determine recommended axial clearance specifications. These specifications will include the range of clearances allowed and any specific adjustments required. 3. Disassembly: Depending on the motor design, you may need to disassemble it to access the components that control axial clearance. This may involve removing caps, screws and other fasteners. Make sure to keep track of removed components and their locations. H1-B-250-A-A-T2-D2-N-B-TB-VN-DN-N-A-30-NN-158-Z-25-NNN H1B250AAT2D2NBTBVNDNNA30NN158Z25NNN H1-B-250-A-A-T2-D2-N-B-TB-VN-DN-N-A-20-NN-080-Z-30-NNN H1B250AAT2D2NBTBVNDNNA20NN080Z30NNN H1-B-250-A-A-T2-D2-N-B-TA-VS-FS-S-A-30-NN-100-Z-25-NNN H1B250AAT2D2NBTAVSFSSA30NN100Z25NNN H1-B-250-A-A-T2-D2-N-B-TA-VN-FN-N-A-30-NN-100-Z-25-NNN H1B250AAT2D2NBTAVNFNNA30NN100Z25NNN H1-B-250-A-A-T2-D2-N-B-TA-VN-DN-N-A-30-NN-105-Z-25-NNN H1B250AAT2D2NBTAVNDNNA30NN105Z25NNN H1-B-250-A-A-T1-DA-N-B-TA-VN-FN-N-A-20-NN-085-Z-30-NNN H1B250AAT1DANBTAVNFNNA20NN085Z30NNN H1-B-250-A-A-T1-DA-N-A-TA-VS-DS-P-A-20-NN-125-Z-25-NNN H1B250AAT1DANATAVSDSPA20NN125Z25NNN H1-B-250-A-A-T1-D1-N-B-TB-VS-FS-S-A-20-NN-050-Z-20-NNN H1B250AAT1D1NBTBVSFSSA20NN050Z20NNN H1-B-250-A-A-T1-D1-N-B-TB-VS-DS-B-A-20-NN-107-Z-28-NNN H1B250AAT1D1NBTBVSDSBA20NN107Z28NNN H1-B-250-A-A-P2-D2-N-B-TA-VS-DS-S-A-30-NN-150-Z-24-NNN H1B250AAP2D2NBTAVSDSSA30NN150Z24NNN H1-B-250-A-A-P1-D1-N-B-TA-VS-DS-S-A-30-NN-050-Z-24-NNN H1B250AAP1D1NBTAVSDSSA30NN050Z24NNN H1-B-250-A-A-P1-D1-N-A-TA-VS-DS-S-A-30-NN-065-Z-24-NNN H1B250AAP1D1NATAVSDSSA30NN065Z24NNN H1-B-250-A-A-P1-D1-N-A-TA-VS-DS-S-A-30-NN-052-Z-24-NNN H1B250AAP1D1NATAVSDSSA30NN052Z24NNN H1-B-250-A-A-MH-CA-I-B-RB-VS-DS-S-N-NN-NP-050-N-00-NNN H1B250AAMHCAIBRBVSDSSNNNNP050N00NNN H1-B-250-A-A-MH-CA-D-B-RA-VN-FN-N-N-NN-NP-168-N-00-NNN H1B250AAMHCADBRAVNFNNNNNNP168N00NNN H1-B-250-A-A-M2-CA-N-C-RB-VS-DS-S-A-20-NP-068-N-00-NNN H1B250AAM2CANCRBVSDSSA20NP068N00NNN H1-B-250-A-A-M2-CA-N-B-RA-VS-DS-S-A-30-NP-000-N-00-NNN H1B250AAM2CANBRAVSDSSA30NP000N00NNN H1-B-250-A-A-M2-CA-N-A-RB-VN-DN-N-N-NN-NP-000-N-00-NNN H1B250AAM2CANARBVNDNNNNNNP000N00NNN H1-B-250-A-A-M2-CA-N-A-RA-VS-DS-S-A-30-NP-052-N-00-NNN H1B250AAM2CANARAVSDSSA30NP052N00NNN H1-B-250-A-A-M2-CA-N-A-RA-VS-DS-P-N-NN-NP-000-N-00-NNN H1B250AAM2CANARAVSDSPNNNNP000N00NNN 4. Measure the current clearance: Use a precision measurement tool such as a caliper or micrometer to measure the existing axial clearance. This will serve as a baseline for your adjustments. 5. Adjustment method: The method of adjusting the axial clearance may vary. It may involve adding or removing spacers or spacers, adjusting bearing positions, or modifying other components. Please follow the manufacturer's guidelines for specific adjustments. 6. Install or remove spacers: If you use spacers for adjustment, carefully install or remove them as needed. Spacers are thin, flat materials placed between components to adjust gaps or gaps. 7. Reassembly: Carefully reassemble the motor, making sure all components are properly aligned and tightened according to the manufacturer's instructions. Make sure no new problems are introduced during reassembly. 8. Test the motor: After reassembly, turn on the power to the motor and test its operation. Closely monitor axial clearance to ensure it is within specified limits. 9. Fine adjustment: If necessary, make further adjustments to achieve the required axial clearance. Repeat the adjustment and testing process until the gap falls within the specified range. 10. Record: Record the final axial clearance measurement and any adjustments made for future reference. This documentation is critical for maintenance and troubleshooting. 11. Maintenance plan: Implement a regular maintenance plan, check and adjust the axial clearance as needed to ensure that the motor continues to operate efficiently. H1-B-250-A-A-M2-CA-N-A-RA-VN-DN-N-N-NN-NP-000-N-00-NNN H1B250AAM2CANARAVNDNNNNNNP000N00NNN H1-B-250-A-A-M2-CA-N-A-RA-VN-DN-N-A-30-NP-050-N-00-NNN H1B250AAM2CANARAVNDNNA30NP050N00NNN H1-B-250-A-A-M1-CA-N-B-RB-VS-DS-B-A-20-NP-000-N-00-NNN H1B250AAM1CANBRBVSDSBA20NP000N00NNN H1-B-250-A-A-LH-BA-K-B-PB-VN-FN-N-A-30-NP-050-N-00-NNN H1B250AALHBAKBPBVNFNNA30NP050N00NNN H1-B-250-A-A-LH-BA-K-B-PB-VN-DN-N-A-30-NP-050-N-00-NNN H1B250AALHBAKBPBVNDNNA30NP050N00NNN H1-B-250-A-A-LH-BA-K-B-PA-VN-FN-N-A-30-NP-050-N-00-NNN H1B250AALHBAKBPAVNFNNA30NP050N00NNN H1-B-250-A-A-LH-BA-K-B-PA-VN-FN-N-A-20-NP-050-N-00-NNN H1B250AALHBAKBPAVNFNNA20NP050N00NNN H1-B-250-A-A-LH-BA-K-B-PA-VN-DN-N-A-20-NP-050-N-00-NNN H1B250AALHBAKBPAVNDNNA20NP050N00NNN H1-B-250-A-A-LH-BA-J-B-PB-VS-FS-P-N-NN-NP-050-N-00-NNN H1B250AALHBAJBPBVSFSPNNNNP050N00NNN H1-B-250-A-A-LH-BA-J-B-PB-VS-FS-P-N-NN-NN-050-N-00-NNN H1B250AALHBAJBPBVSFSPNNNNN050N00NNN H1-B-250-A-A-LH-BA-J-B-PB-VS-DS-P-N-NN-NP-050-N-00-NNN H1B250AALHBAJBPBVSDSPNNNNP050N00NNN H1-B-250-A-A-LH-BA-I-B-PA-VN-FN-N-A-20-NP-050-N-00-NNN H1B250AALHBAIBPAVNFNNA20NP050N00NNN H1-B-250-A-A-LH-BA-I-B-PA-VN-FN-N-A-20-NN-050-N-00-NNN H1B250AALHBAIBPAVNFNNA20NN050N00NNN H1-B-250-A-A-LH-BA-F-B-PB-VN-FN-N-A-30-NP-053-N-00-NNN H1B250AALHBAFBPBVNFNNA30NP053N00NNN H1-B-250-A-A-LH-BA-F-B-PA-VN-DN-N-A-20-NP-053-N-00-NNN H1B250AALHBAFBPAVNDNNA20NP053N00NNN H1-B-250-A-A-LH-BA-E-B-PB-VS-FS-P-A-20-NP-000-N-00-NNN H1B250AALHBAEBPBVSFSPA20NP000N00NNN H1-B-250-A-A-LH-BA-E-B-PB-VS-FS-P-A-20-NN-000-N-00-NNN H1B250AALHBAEBPBVSFSPA20NN000N00NNN H1-B-250-A-A-LH-BA-E-B-PB-VN-DN-N-A-30-NP-112-N-00-NNN H1B250AALHBAEBPBVNDNNA30NP112N00NNN H1-B-250-A-A-LH-BA-E-B-PA-VN-FN-N-A-20-NP-050-N-00-NNN H1B250AALHBAEBPAVNFNNA20NP050N00NNN H1-B-250-A-A-LH-BA-D-B-PA-VN-FN-N-N-NN-NP-168-N-00-NNN H1B250AALHBADBPAVNFNNNNNNP168N00NNN Here are some additional tips and considerations when adjusting piston motor axial clearance: 1. Documentation and Labeling: When you disassemble the motor and make adjustments, take photos or create diagrams to document the original configuration and changes made. Label components and fasteners to ensure you can reassemble them correctly. 2. Torque specifications: When reassembling the motor, follow the manufacturer's recommended fastener torque specifications. Over-tightening or under-tightening can affect the performance of the motor. 3. Precision tools: Use high-quality precision measurement tools to ensure accurate measurements. Calibrate your measuring instruments regularly to maintain accuracy. 4. Environmental precautions: Pay attention to the operating environment of the motor. Extreme temperatures, humidity, and other factors can affect the motor's performance and may require adjustments. 5. Lubrication: Some plunger motors may require lubrication as part of the adjustment process. Follow the manufacturer's guidelines for the type and amount of lubricant used. 6. Safety: Always prioritize safety when using machinery. Follow safety regulations, wear appropriate personal protective equipment (PPE), and work in a well-ventilated area as needed. 7. Professional assistance: If you are not confident in your ability to make precise adjustments, or the motor is a critical component in a complex system, consider consulting a professional technician with experience in motor maintenance. H1-B-250-A-A-LH-BA-D-B-PA-VN-FN-N-N-NN-NN-168-N-00-NNN H1B250AALHBADBPAVNFNNNNNNN168N00NNN H1-B-250-A-A-LH-BA-D-B-PA-VN-DN-N-A-20-NP-053-N-00-NNN H1B250AALHBADBPAVNDNNA20NP053N00NNN H1-B-250-A-A-L2-BA-N-C-PB-VN-FN-N-A-20-NP-169-N-00-NNN H1B250AAL2BANCPBVNFNNA20NP169N00NNN H1-B-250-A-A-L2-BA-N-C-PB-VN-FN-N-A-20-NN-169-N-00-NNN H1B250AAL2BANCPBVNFNNA20NN169N00NNN H1-B-250-A-A-L2-BA-N-B-PB-VS-FS-S-N-NN-NN-085-N-00-NNN H1B250AAL2BANBPBVSFSSNNNNN085N00NNN H1-B-250-A-A-L2-BA-N-B-PB-VS-FS-S-B-20-NP-063-N-00-NNN H1B250AAL2BANBPBVSFSSB20NP063N00NNN H1-B-250-A-A-L2-BA-N-B-PB-VS-FS-S-B-20-NP-060-N-00-NNN H1B250AAL2BANBPBVSFSSB20NP060N00NNN H1-B-250-A-A-L2-BA-N-B-PB-VS-FS-S-A-30-NP-115-N-00-NNN H1B250AAL2BANBPBVSFSSA30NP115N00NNN H1-B-250-A-A-L2-BA-N-B-PB-VS-FS-S-A-30-NP-065-N-00-NNN H1B250AAL2BANBPBVSFSSA30NP065N00NNN H1-B-250-A-A-L2-BA-N-B-PB-VS-FS-S-A-30-NP-050-N-00-NNN H1B250AAL2BANBPBVSFSSA30NP050N00NNN H1-B-250-A-A-L2-BA-N-B-PB-VS-FS-S-A-30-NN-050-N-00-NNN H1B250AAL2BANBPBVSFSSA30NN050N00NNN H1-B-250-A-A-L2-BA-N-B-PB-VS-FS-S-A-20-NN-085-N-00-NNN H1B250AAL2BANBPBVSFSSA20NN085N00NNN H1-B-250-A-A-L2-BA-N-B-PB-VS-DS-S-A-20-NP-000-N-00-NNN H1B250AAL2BANBPBVSDSSA20NP000N00NNN H1-B-250-A-A-L2-BA-N-B-PB-VS-DS-B-N-NN-NP-090-N-00-NNN H1B250AAL2BANBPBVSDSBNNNNP090N00NNN H1-B-250-A-A-L2-BA-N-B-PB-VS-DS-B-B-40-NP-100-N-00-NNN H1B250AAL2BANBPBVSDSBB40NP100N00NNN H1-B-250-A-A-L2-BA-N-B-PB-VN-FN-N-N-NN-NP-125-N-00-NNN H1B250AAL2BANBPBVNFNNNNNNP125N00NNN H1-B-250-A-A-L2-BA-N-B-PB-VN-FN-N-A-20-NP-140-N-00-NNN H1B250AAL2BANBPBVNFNNA20NP140N00NNN H1-B-250-A-A-L2-BA-N-B-PB-VN-FN-N-A-20-NP-125-N-00-NNN H1B250AAL2BANBPBVNFNNA20NP125N00NNN H1-B-250-A-A-L2-BA-N-B-PB-VN-FN-N-A-20-NP-110-C-00-NNN H1B250AAL2BANBPBVNFNNA20NP110C00NNN H1-B-250-A-A-L2-BA-N-B-PB-VN-FN-N-A-20-NP-075-N-00-NNN H1B250AAL2BANBPBVNFNNA20NP075N00NNN 8. Maintenance Records: Keep detailed records of all adjustments, maintenance and testing procedures. These records are valuable for tracking the motor's performance over time and identifying any trends or issues. 9. Calibration: Periodically recalibrate the motor after adjustment to ensure it continues to meet performance specifications. This may involve further fine-tuning of the axial clearance. 10. Preventive maintenance: Implement a regular preventive maintenance plan for the plunger motor. Regular inspections and adjustments help prevent unexpected failures and downtime. 11. Training: Ensure that personnel responsible for motor maintenance and adjustments are adequately trained and familiar with the design and requirements of the specific motor. By following these additional tips and considering your plunger motor's specific requirements, you can maintain its optimal performance and extend its service life. Always prioritize safety, accuracy and following manufacturer guidelines during adjustment and maintenance.
This article is published by the official website of Baolilai Hydraulics, please contact the author and indicate the source for reprinting:https://www.baolilai-pump.cn/news/1074.html